How to Use Apollo Data Importer
Installation Instructions
To install the Apollo Data Importer app, follow these steps:
- Follow the installation link or search for the app in the marketplace.
- Install the app.
Prerequisites
- A valid monday.com account.
- Basic understanding of how to navigate and use monday.com.
- Ensure your browser is up to date for the best experience.
- A valid Apollo.io account (of any tier).
- An Apollo.io API key. (You can generate this in your Apollo.io account settings.)
Please ensure you meet these prerequisites before proceeding with the installation of the Apollo Data Importer app.
First Time Use Instructions
To get started with the Apollo Data Importer app, follow these steps:
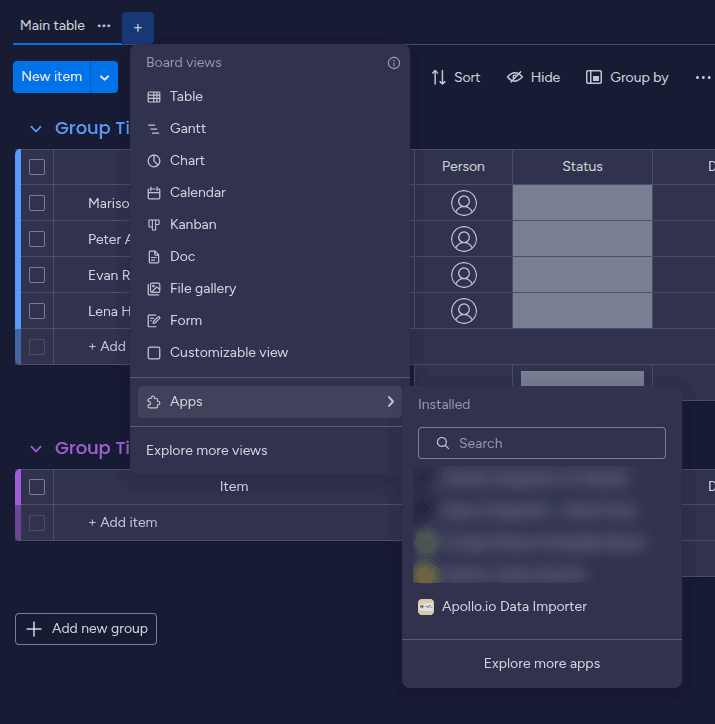
- Install the app from the monday.com marketplace and add it in the board.
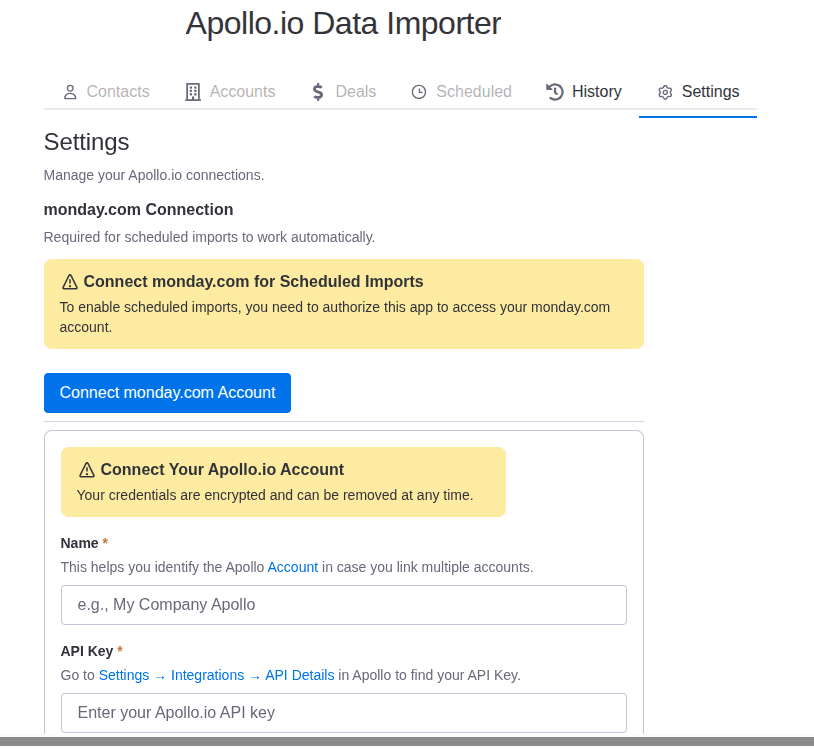
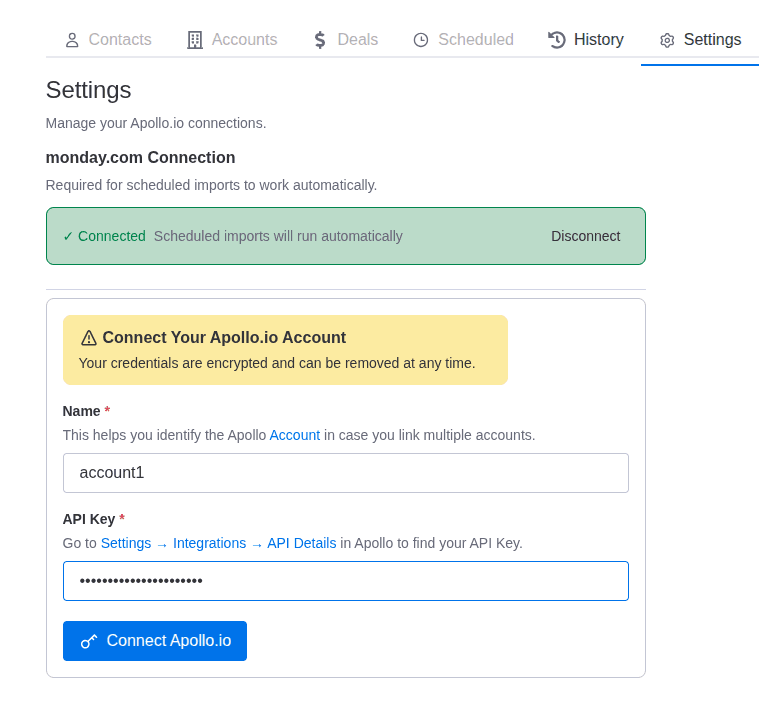
- First thing you are going to see is the settings tab, where you need to connect (authorize) monday.com and add your Apollo connection (enter your Apollo.io API key).
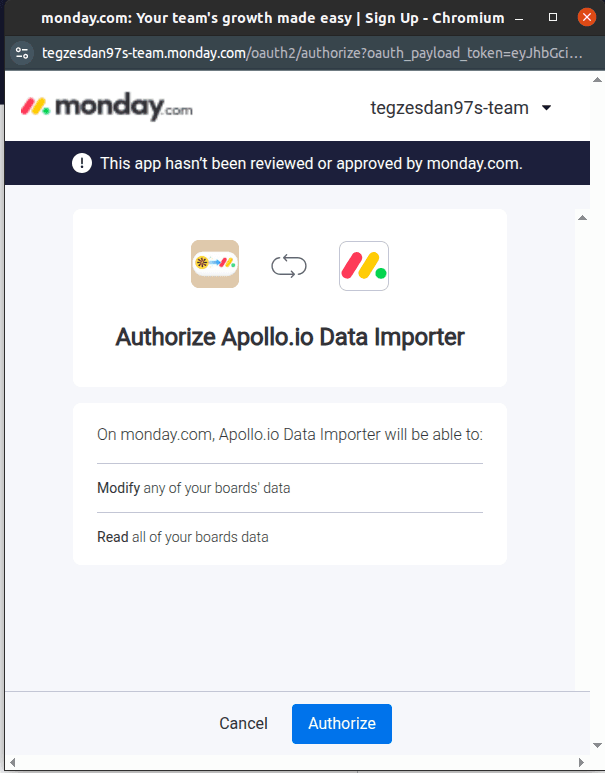
- Authorize monday.com to connect with the app.
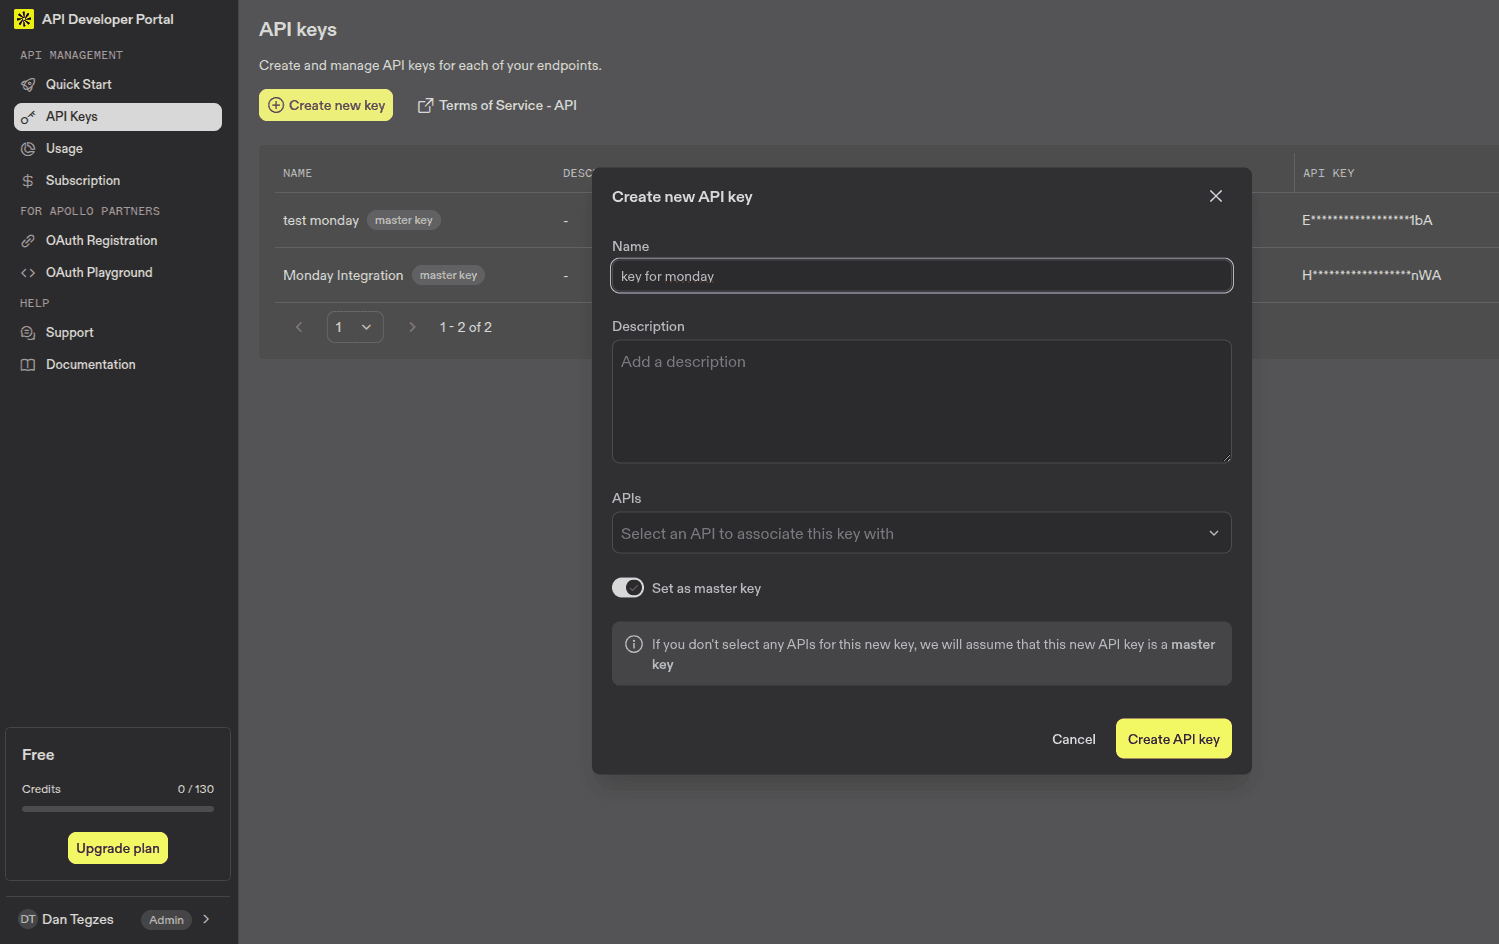
- Get your Apollo.io API key by clicking the URL and navigating to the keys section.
- Add your Apollo.io connection.
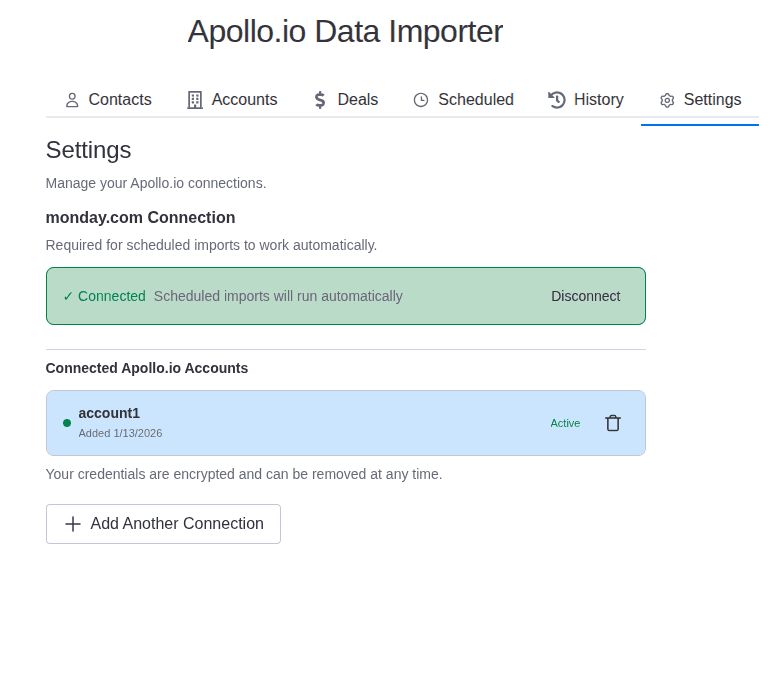
- This is how Settings tab should look like after adding the accounts.
- Now we are ready to import data from Apollo.io. Go to the Contacts tab, select the board you want to import to, select how you want to import (either as Items or as Groups), select the Import Type (only new data, or only update the existing contacts without adding new ones, or both) and click the Import button.
By default, for each data type, the app will try to map the most common fields/columns (like First Name, Last Name, Email, Company Name, etc.). If you want to add missing columns to the board, check the “Add columns that could not be mapped” checkbox. The app will automatically add the extra columns in the board.
You also have the option to customize the mapping by clicking on the “Use custom field mapping” button. This will open a new section where you can manually map each Apollo field to a specific monday.com column.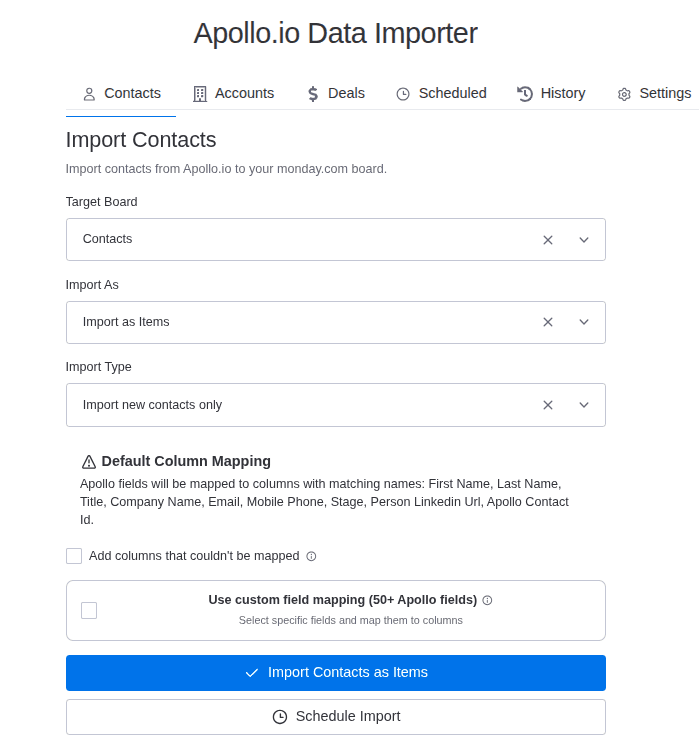
- Test the app by importing a small set of contacts and verifying that they appear correctly in your monday.com board.

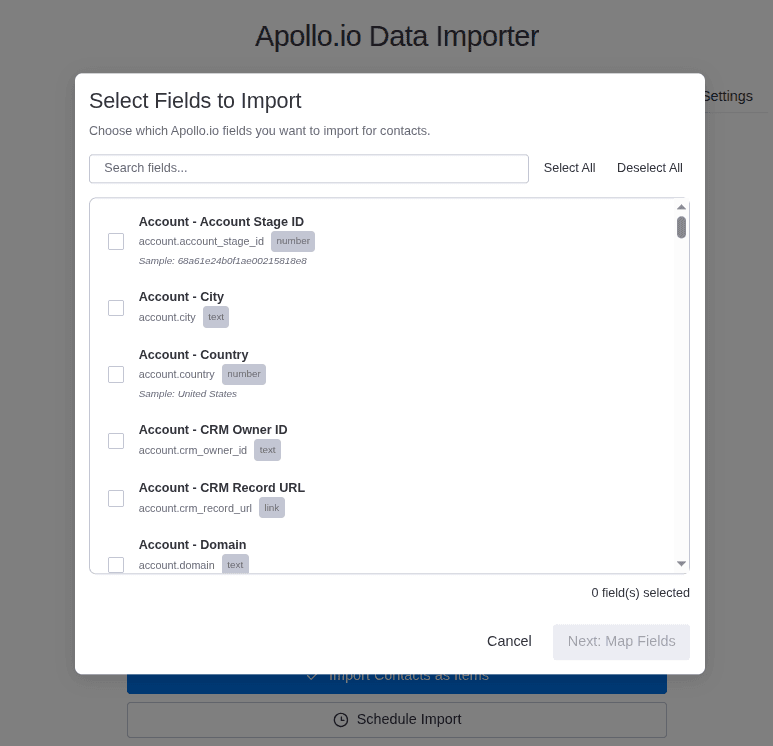
- This is the custom fields mapping view. Here you can manually map each Apollo field to a specific monday.com column. IF the column is not in the board yet, you can add it manually from here.
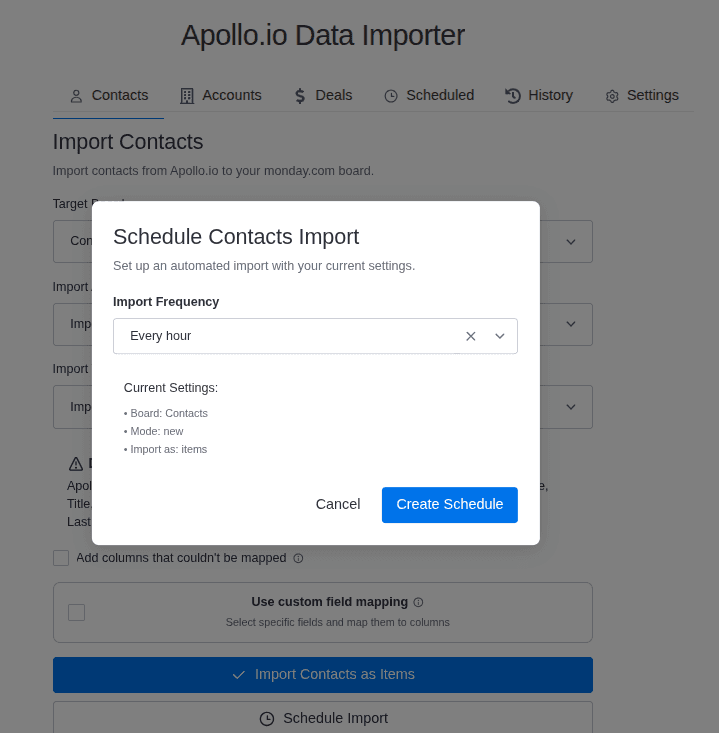
- You can also schedule imports to run automatically at specific intervals (hourly, daily, weekly). Go to the Schedule tab, set up your preferred schedule, and save the settings.
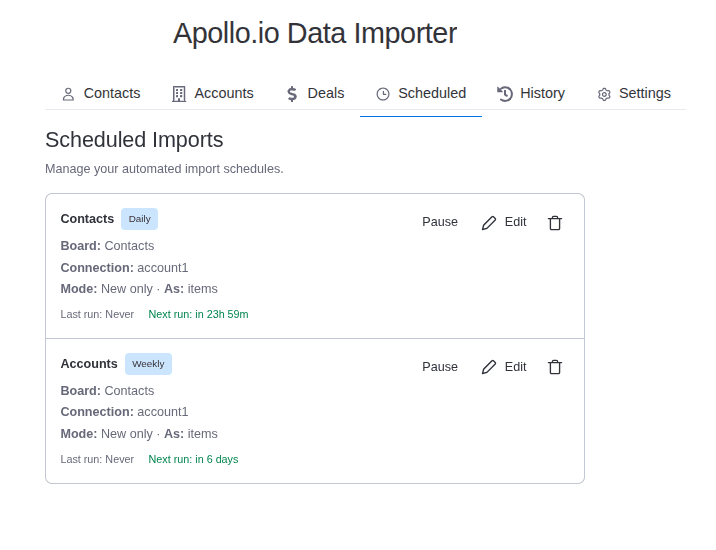
- In the Scheduled tab, you can see all your scheduled imports, their status, and the next run time.
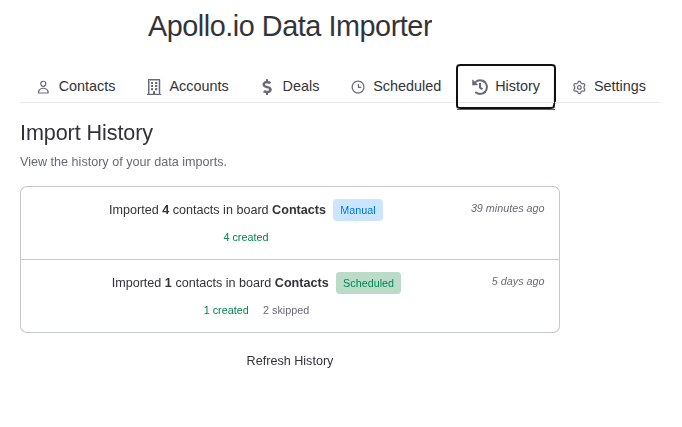
- In the History tab, you can see all your past imports.
If you encounter any issues, please refer to the support section for assistance.
Support Media
Here are some helpful resources to get you started with the Custom Colors Calendar app: